User identities
Build multi-user applications with agent state isolation and shared resources.
You may be building a multi-user application with Letta, in which each user is associated with a specific agent. In this scenario, you can use Identities to associate each agent with a user in your application.
Using Identities
Section titled “Using Identities”Let’s assume that you have an application with multiple users that you’re building on a Letta server running in Docker or the Letta API.
Each user has a unique username, starting at user_1, and incrementing up as you add more users to the platform.
To associate agents you create in Letta with your users, you can first create an Identity object with the user’s unique ID as the identifier_key for your user, and then specify the Identity object ID when creating an agent.
For example, with user_1, we would create a new Identity object with identifier_key="user_1" and then pass identity.id into our create agent request:
curl -X POST https://app.letta.com/v1/identities/ \ -H "Authorization: Bearer <token>" \ -H "Content-Type: application/json" \ -d '{ "identifier_key": "user_1", "name": "Caren", "identity_type": "user"}'{"id":"identity-634d3994-5d6c-46e9-b56b-56e34fe34ca0","identifier_key":"user_1","name":"Caren","identity_type":"user","project_id":null,"agent_ids":[],"organization_id":"org-00000000-0000-4000-8000-000000000000","properties":[]}curl -X POST https://app.letta.com/v1/agents/ \ -H "Authorization: Bearer <token>" \ -H "Content-Type: application/json" \ -d '{ "memory_blocks": [], "llm": "anthropic/claude-3-5-sonnet-20241022", "context_window_limit": 200000, "embedding": "openai/text-embedding-3-small", "identity_ids": ["identity-634d3994-5d6c-46e9-b56b-56e34fe34ca0"]}'# assumes that you already instantiated a clientidentity = client.identities.create( identifier_key="user_1", name="Caren", identity_type="user")agent = client.agents.create( memory_blocks=[], model="anthropic/claude-3-5-sonnet-20241022", context_window_limit=200000, identity_ids=[identity.id])// assumes that you already instantiated a clientconst identity = await client.identities.create({ identifierKey: "user_1", name: "Caren", identityType: "user",});const agent = await client.agents.create({ memory_blocks: [], model: "anthropic/claude-3-5-sonnet-20241022", context_window_limit: 200000, identity_ids: [identity.id],});Then, if I wanted to search for agents associated with a specific user (e.g. called user_id), I could use the identifier_keys parameter in the list agents request:
curl -X GET "https://app.letta.com/v1/agents/?identifier_keys=user_1" \ -H "Accept: application/json"# assumes that you already instantiated a clientuser_agents = client.agents.list( identifier_keys=["user_1"])// assumes that you already instantiated a clientawait client.agents.list({ identifierKeys: ["user_1"]});You can also create an identity object and attach it to an existing agent. This can be useful if you want to enable multiple users to interact with a single agent:
curl -X POST https://app.letta.com/v1/identities/ \ -H "Authorization: Bearer <token>" \ -H "Content-Type: application/json" \ -d '{ "identifier_key": "user_1", "name": "Sarah", "identity_type": "user" "agent_ids": ["agent-00000000-0000-4000-8000-000000000000"]}'# assumes that you already instantiated a clientidentity = client.identities.create({ identifier_key="user_1", name="Sarah", identity_type="user" agent_ids=["agent-00000000-0000-4000-8000-000000000000"]})// assumes that you already instantiated a clientconst identity = await client.identities.create({ identifierKey: "user_1", name: "Sarah", identityType: "user" agentIds: ["agent-00000000-0000-4000-8000-000000000000"]})Using Agent Tags to Identify Users
Section titled “Using Agent Tags to Identify Users”It’s also possible to utilize our agent tags feature to associate agents with specific users. To associate agents you create in Letta with your users, you can specify a tag when creating an agent, and set the tag to the user’s unique ID.
This example assumes that you have a self-hosted Letta server running on localhost (for example, by running docker run ...).
View example SDK code
import Letta from "@letta-ai/letta-client";
// Connect to the Letta APIconst client = new Letta({ apiKey: process.env.LETTA_API_KEY });const userId = "my_uuid";
// create an agent with the userId tagconst agent = await client.agents.create({  memory_blocks: [],  model: "anthropic/claude-3-5-sonnet-20241022",  context_window_limit: 200000,  tags: [userId],});console.log(`Created agent with id ${agent.id}, tags ${agent.tags}`);
// list agentsconst userAgents = await client.agents.list({ tags: [userId] });const agentIds = userAgents.map((agent) => agent.id);console.log(`Found matching agents ${agentIds}`);
from letta_client import Lettaimport os
# Connect to the Letta APIclient = Letta(api_key=os.getenv("LETTA_API_KEY"))user_id = "my_uuid"
# create an agent with the user_id tagagent = client.agents.create( memory_blocks=[], model="anthropic/claude-3-5-sonnet-20241022", context_window_limit=200000, tags=[user_id])print(f"Created agent with id {agent.id}, tags {agent.tags}")
# list agentsuser_agents = client.agents.list(tags=[user_id])agent_ids = [agent.id for agent in user_agents]print(f"Found matching agents {agent_ids}")Creating and Viewing Tags in the ADE
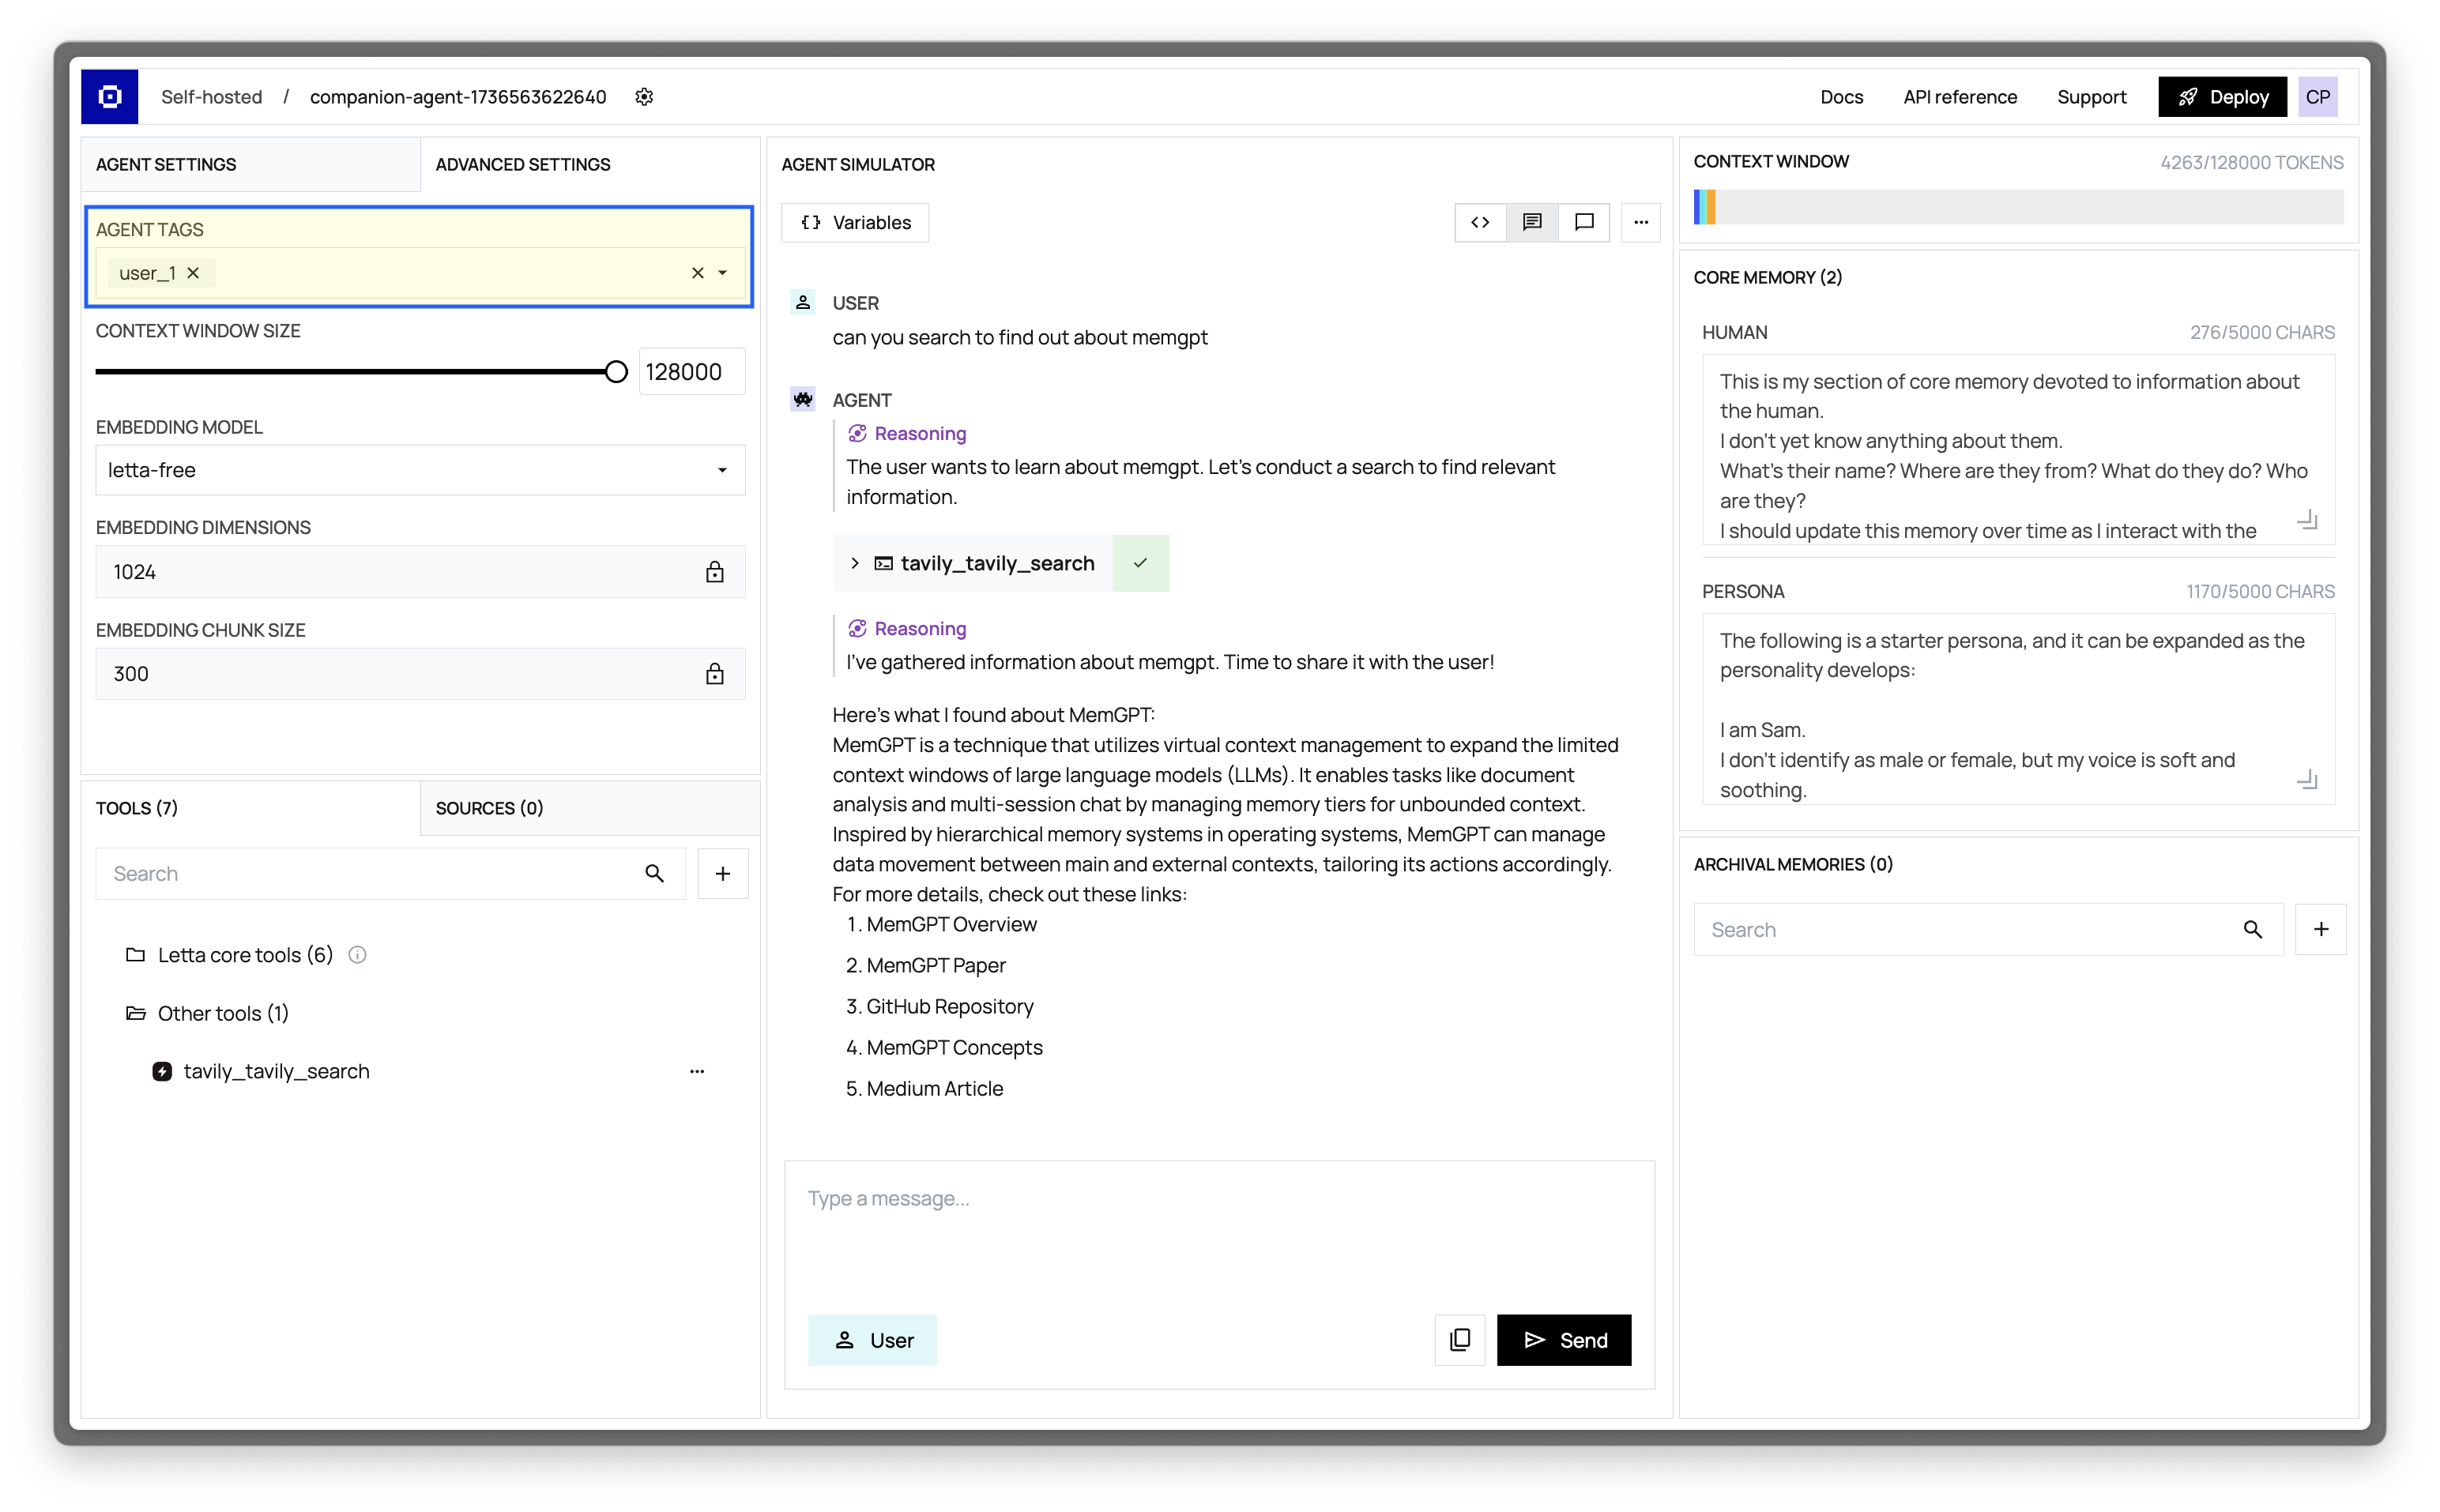
Section titled “Creating and Viewing Tags in the ADE”You can also modify tags in the ADE. Simply click the Advanced Settings tab in the top-left of the ADE to view an agent’s tags. You can create new tags by typing the tag name in the input field and hitting enter.