

Bring Your Own Machine (BYOM)
Make your computers available to Letta agents from the web or Letta app
Remote environments separate where you interact with a Letta agent from where its tools execute. You can chat from chat.letta.com, the Letta app, or another client while the agent runs shell commands, reads files, and writes code on a machine you control.
Without a remote environment, chat.letta.com uses a managed cloud sandbox by default. With a remote environment, you can select a named machine — your laptop, a workstation, or a cloud VM — and run the agent there instead.
A remote environment is different from App Server. A remote environment connects outward to Letta Cloud and supplies tool execution for agents hosted there. App Server accepts direct connections from your application and can use either local agent state or agent state hosted in Letta Cloud. Use App Server for a directly connected application runtime; use a remote environment when you want to keep using Letta Cloud’s hosted clients and control plane.
How it works
Section titled “How it works”A remote environment is a running Letta Code process that connects a machine to your Letta account.
- You start the Letta app with remote access enabled, or run
letta serveron a machine. - The machine opens an outbound WebSocket connection to Letta Cloud and appears as a selectable environment.
- You choose that environment from
chat.letta.comor the Letta app. - Tool calls execute on the selected machine, with the same human-in-the-loop approvals used by local agent sessions.
The agent’s memory and conversation history stay with the agent. The environment only determines where tools run. That means you can move the same conversation between a cloud sandbox, your laptop, and a remote VM without starting over.
When to use remote environments
Section titled “When to use remote environments”Use a remote environment when the agent needs access to a persistent computer outside the default sandbox, e.g. a long-running dev server or GPU workstation.
For quick browser or mobile sessions that do not need a specific machine, the default execution environment is often sufficient; on web/mobile, the default execution environment is a cloud sandbox, and in the Letta app or CLI it is your local machine.
Quickstart
Section titled “Quickstart”-
Install the Letta app.
-
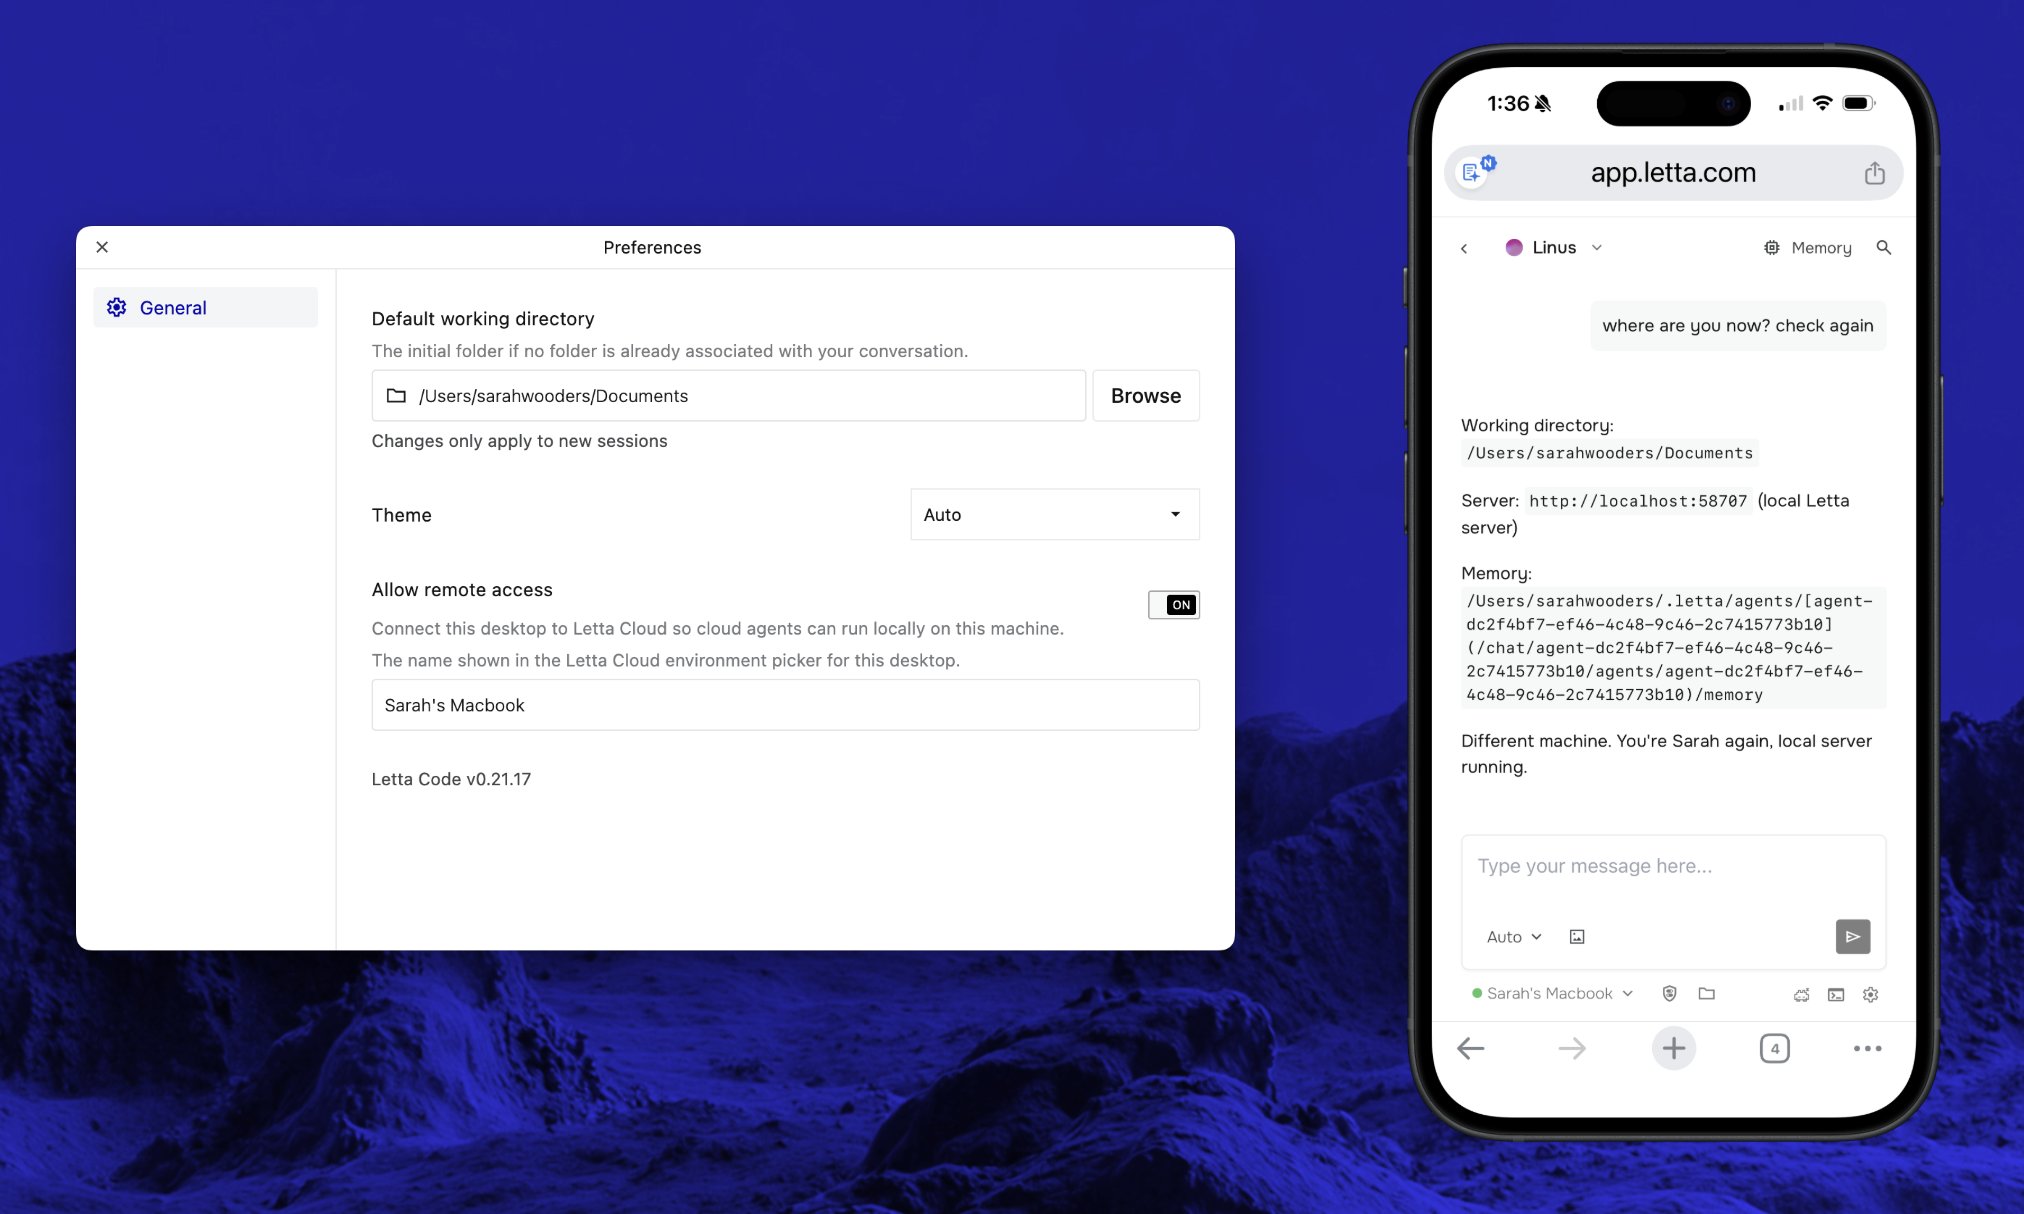
Open app settings and enable Allow remote access.
-
Open chat.letta.com from another device and select your desktop environment from the environment picker.
For example, if you enable remote access on your home PC, you can chat with agents from your phone while tool execution happens on your home PC, as long as the Letta app is running there.
-
Install the Letta CLI and log in:
npm install -g @letta-ai/letta-codeletta -
Start a remote environment:
letta server --env-name "work-laptop" -
Open chat.letta.com or the Letta app and select
work-laptopfrom the environment picker.
Always-on cloud VM deployment
Section titled “Always-on cloud VM deployment”You can run letta server on a cloud VM or container to keep an environment online. letta server only makes an outbound WebSocket connection to Letta Cloud, so there are no inbound ports to open, reverse proxies to configure, or domain names to manage.
Authentication
Section titled “Authentication”There are two ways to authenticate a remote letta server:
Option A: OAuth device flow (recommended). If no API key is set, letta server starts an OAuth login flow and prints an authorization URL to stdout.
Option B: API key (Developer Plans only). Set LETTA_API_KEY as an environment variable before running letta server.
With OAuth, the server prints an authorization URL on startup:
No API key found. Starting OAuth login...
To authenticate, visit: https://platform.letta.com/oauth/device?user_code=ABCD-EFGHYour code: ABCD-EFGH
Waiting for authorization...
Open the URL in your browser, approve the request, and the server connects. Credentials are persisted to disk, so subsequent restarts authenticate automatically.
If you use OAuth on a remote machine or container, make sure ~/.letta/ lives on persistent storage. That is where Letta stores fallback auth state when no system keychain is available.
DigitalOcean
Section titled “DigitalOcean”Create a droplet:
doctl compute droplet create letta-remote \ --size s-1vcpu-512mb-10gb \ --image ubuntu-24-04-x64 \ --region sfo3 \ --ssh-keys $(doctl compute ssh-key list --format ID --no-header | head -1)Or create one from the DigitalOcean dashboard: pick Ubuntu 24.04, the $4/mo plan, and your SSH key.
SSH in and install:
ssh root@<droplet-ip>
# Install Node.js 20 + build toolscurl -fsSL https://deb.nodesource.com/setup_20.x | bash -apt-get install -y nodejs python3 make g++
# Install Letta Codenpm install -g @letta-ai/letta-code
# Start the serverletta server --env-name "cloud"
To keep it running across reboots, create a systemd service:
cat > /etc/systemd/system/letta-server.service << 'SYSTEMD'[Unit]Description=Letta Code Remote ServerAfter=network-online.targetWants=network-online.target
[Service]Type=simpleExecStart=/usr/bin/letta server --env-name "cloud"Restart=alwaysRestartSec=5
[Install]WantedBy=multi-user.targetSYSTEMD
systemctl daemon-reloadsystemctl enable --now letta-server
Before enabling the service, run letta server --env-name "cloud" once manually over SSH and complete the OAuth device flow in your browser. The saved auth state under ~/.letta/ is reused on restart. If the service ever needs re-authentication, check journalctl -u letta-server -f for the device code URL.
On Developer plans, you can use an API key instead by adding Environment=LETTA_API_KEY=your-key to the service file.
Fly.io
Section titled “Fly.io”Clone the deployment repo:
git clone https://github.com/letta-ai/letta-app-server-deployment.gitcd letta-app-server-deploymentLaunch and deploy:
fly launch --name letta-remote --no-deploy
# Create a persistent volume for auth and statefly volumes create letta_data --region sjc --size 1
fly deploy
The included fly.toml configures the volume mount and sets ENV_NAME to "fly". After deploy, check the logs:
fly logs --app letta-remoteLook for the OAuth authorization URL, visit it in your browser, and approve the request. The mounted volume keeps /root/.letta/ around, so auth survives machine restarts. On Developer plans, you can skip OAuth by setting fly secrets set LETTA_API_KEY="your-key" before deploying.
Railway
Section titled “Railway”One-click deploy:

Or deploy manually:
- Fork the letta-app-server-deployment repo, or push your own Dockerfile.
- Connect the repo in Railway.
- Add a persistent volume mounted at
/rootto preserve auth and state across deploys. - Deploy.
- Open the deploy logs, find the OAuth URL, and approve it in your browser.
With the Railway CLI:
railway initrailway uprailway logsAfter the first deploy, check the logs for the OAuth authorization URL. The volume at /root preserves auth state across restarts. On Developer plans, you can skip OAuth by setting railway variables set LETTA_API_KEY="your-key" before deploying.
Which platform to choose
Section titled “Which platform to choose”| DigitalOcean | Fly.io | Railway | |
|---|---|---|---|
| Setup | SSH + 3 commands | Dockerfile + CLI | Git push or CLI |
| Cost | $4/mo flat | ~$3/mo usage | ~$5/mo usage |
| Persistence | systemd | Built-in | Built-in |
| Best for | Simplicity, full control | Infra-as-code workflows | Quick deploys from GitHub |
For most users, DigitalOcean is the fastest path: a small VM where you SSH in and run a few commands. All platforms include ready-to-use configs in the letta-app-server-deployment repo.
For lower-level integrations, see the Remote Client API guide.
Configuration
Section titled “Configuration”Saved settings
Section titled “Saved settings”| Setting | Location | Description |
|---|---|---|
deviceId | ~/.letta/settings.json | Stable UUID, generated once |
listenerEnvName | .letta/settings.local.json (per-project) | Saved environment name |
| Remote server state | ~/.letta/remote-settings.json | Per-conversation working directories and permission modes restored after restarts |
Session logs
Section titled “Session logs”| Path | Description |
|---|---|
~/.letta/logs/remote/{timestamp}.log | Per-session transport log |