

Build a React chat UI
Build and customize a persistent React chat with the Letta Agent SDK
This tutorial teaches you how to build a React chat application for one persistent Letta agent. The demo agent can answer questions, reason, and use web tools. Its conversations remain available after the user reloads the page.
The finished project is a starting point for your own frontend. You can replace its colors, layout, and components without changing the Agent SDK integration.
Before you start
Section titled “Before you start”This tutorial starts where the Agent SDK quickstart ends. You need basic React and Next.js knowledge. You also need these three terms:
- An agent is persistent. It keeps its identity and memory.
- A conversation is one saved message thread on that agent.
- A session is a temporary connection that sends and streams work for one conversation.
You will learn how to:
- Keep the Letta API key in server code.
- Open an Agent SDK session for each turn.
- Show reasoning, text, and tool calls in the order they arrive.
- Restore the same transcript after a reload.
View the complete project on
GitHub. The repository
also includes a guided learning path, customization recipes, tests, and an
AGENTS.md file for coding agents.
Run the finished project
Section titled “Run the finished project”Run the project before you study its parts. This gives each later section a visible result to explain.
You need Node.js 22.19 or later and a Letta API key.
1. Clone and install
Section titled “1. Clone and install”Clone the project and install its dependencies:
git clone https://github.com/letta-ai/letta-agent-sdk-react-chat.gitcd letta-agent-sdk-react-chatnpm install2. Add your API key
Section titled “2. Add your API key”Copy the example environment file:
cp .env.example .env.localReplace your-key-here in .env.local with your API key. Remove the sample
LETTA_CHAT_AGENT_ID line.
The variable does not use a NEXT_PUBLIC_ prefix. Next.js keeps the key on the
server and out of the browser bundle.
3. Create the demo agent
Section titled “3. Create the demo agent”The setup script creates one Cloud agent with the free letta/auto model. It
gives the agent a research persona and stores the new agent ID in .env.local.
Run the script once:
node --env-file=.env.local scripts/create-agent.mjsYour environment file now contains both values that the server routes need:
LETTA_API_KEY=your-key-hereLETTA_CHAT_AGENT_ID=agent-...The application creates many conversations on this one agent. Each conversation has its own transcript, while the agent remains the same.
4. Start the chat
Section titled “4. Start the chat”Start Next.js:
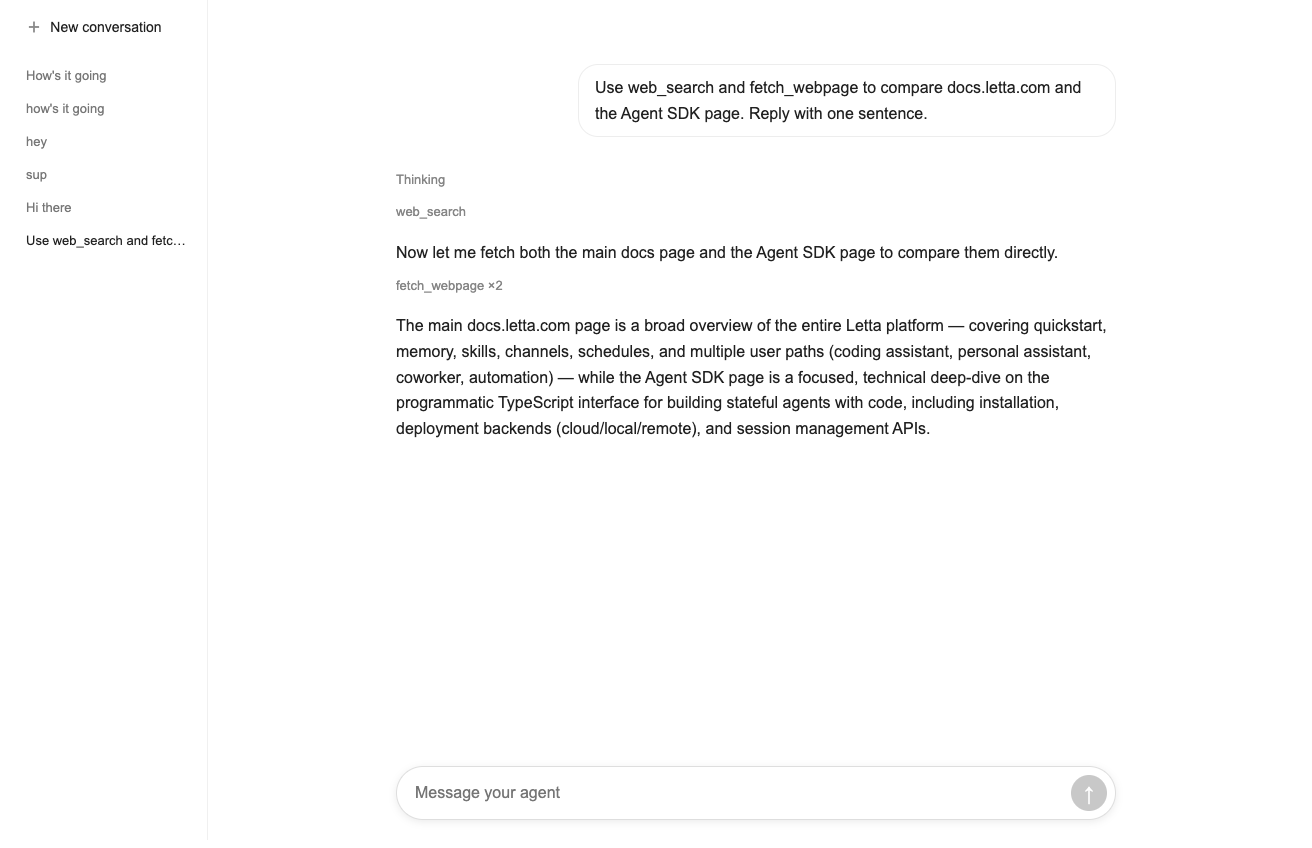
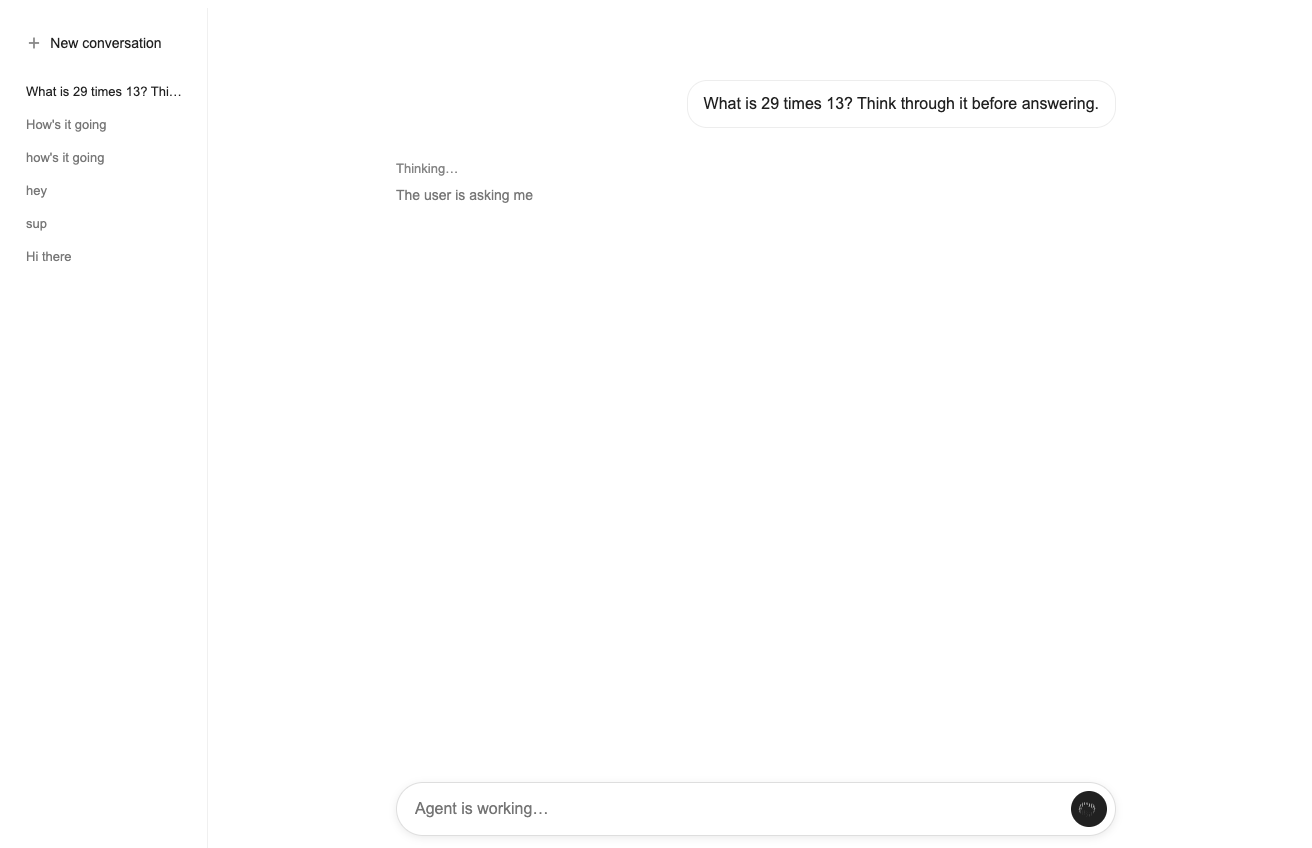
npm run devOpen http://localhost:3000. The sidebar shows saved conversations. The center column shows the selected transcript. The composer at the bottom sends a new message.
Send this message to make the agent use a tool:
Use web_search to find the Letta documentation homepage and reply with only its title.While the turn runs, the composer says Agent is working…. The transcript
shows the agent’s reasoning and a web_search tool row before the final answer.
Reload the page. The same reasoning, tool call, and answer must return in the same order.
Follow one message through the application
Section titled “Follow one message through the application”When the user submits the composer, the message crosses four boundaries:
flowchart LR
    user[User submits composer]
    route[Next.js server route]
    session[Agent SDK session]
    agent[Persistent Letta agent]
    reducer[React transcript state]

    user -->|message + conversation ID| route
    route -->|resume, send, stream| session
    session <--> agent
    session -->|SDK messages| route
    route -->|safe browser events| reducer
    reducer -->|ordered parts| user
The browser owns the interface. The Next.js routes own the API key and Agent SDK sessions. Letta owns the persistent agent, conversations, and messages.
1. The browser starts the turn
Section titled “1. The browser starts the turn”hooks/use-chat-session.ts creates a conversation when the user sends the first
message. It then posts the user’s text and conversation ID to /api/chat.
The hook also adds the user message and an empty assistant message to React state immediately. The page therefore responds before the first SDK event arrives.
2. The server sends and streams the turn
Section titled “2. The server sends and streams the turn”app/api/chat/route.ts verifies that the conversation belongs to the configured
agent. It then resumes that conversation, sends the user message, and reads the
session stream.
One session.stream() iteration returns one typed SDK message. For example:
{ type: "tool_call", toolCallId: "call-1", toolName: "web_search", toolInput: { query: "Letta documentation" }, rawArguments: '{"query":"Letta documentation"}', uuid: "message-1",}The route handles text, reasoning, tool calls, tool results, errors, and the terminal result in one loop:
streamMessages: for await (const message of session.stream()) {  switch (message.type) {    case "assistant":      writeEvent(controller, encoder, {        type: "assistant",        content: message.content,      });      break;
    case "reasoning":      writeEvent(controller, encoder, {        type: "reasoning",        content: message.content,      });      break;
    case "tool_call":      writeEvent(controller, encoder, {        type: "tool_call",        id: message.toolCallId,        name: message.toolName,        input: message.toolInput,        inputFragment: message.rawArguments ?? "",      });      break;
    case "tool_result":      writeEvent(controller, encoder, {        type: "tool_result",        id: message.toolCallId,        isError: message.isError,      });      break;
    case "result":      break streamMessages;  }}
The browser receives only the fields that it displays. The API key and raw tool output remain on the server.
3. React builds one ordered transcript
Section titled “3. React builds one ordered transcript”lib/letta/browser-events.ts reduces each browser event into the active
assistant message. The display model contains one ordered list:
type MessagePart = | { type: "text"; content: string } | { type: "reasoning"; content: string; complete: boolean } | { type: "tools"; tools: ToolState[] };components/chat/transcript-message.tsx maps over that list once. A turn can
therefore keep this order:
reasoning → text → parallel tools → reasoning → textSeparate text and tool sections move later text above earlier tool calls.
Tool arguments can arrive in several rawArguments fragments. The reducer
joins fragments with the same tool-call ID. It also groups consecutive tools
and settles any remaining running tool when the turn ends.
4. A reload rebuilds the same transcript
Section titled “4. A reload rebuilds the same transcript”When the user selects a saved conversation, /api/conversations opens a
temporary session and requests its initial state:
const session = client.resumeSession(conversationId);
try {  const state = await session.bootstrapState({    order: "desc",    limit: 100,  });
  return Response.json({    messages: projectTranscript([...state.messages].reverse()),  });} finally {  session.close();}
projectTranscript() converts the saved SDK messages into the same
MessagePart[] model used by live events. This preserves reasoning, tool calls,
tool status, and event order after a reload.
Build your own frontend
Section titled “Build your own frontend”Keep the data path stable while you replace the visible interface. Start with the smallest file that owns your change:
| What you want to change | Start here |
|---|---|
| Colors, spacing, width, or radii | styles/tokens.css |
| Layout and responsive behavior | styles/chat.module.css |
| User and assistant message markup | components/chat/transcript-message.tsx |
| Tool call display | components/chat/tool-disclosure.tsx |
| Reasoning display | components/chat/thinking-disclosure.tsx |
| Composer and loading state | components/chat/chat-composer.tsx |
| Conversation sidebar | components/chat/conversation-sidebar.tsx |
| Browser conversation behavior | hooks/use-chat-session.ts |
| Live SDK event handling | lib/letta/browser-events.ts |
| Saved transcript handling | lib/letta/transcript.ts |
| Agent SDK session and credential logic | app/api/ |
Change styles/tokens.css first when you want a new visual theme:
:root { --chat-background: #fff; --chat-text: #212121; --chat-muted: #777; --chat-content-width: 720px; --chat-sidebar-width: 200px; --chat-composer-radius: 28px;}Do not change app/api/ or lib/letta/ for colors, spacing, labels, or markup.
Keep the sidebar and composer outside the scrolling transcript so streamed
content does not move them.
The repository includes the following guides:
docs/LEARN.mdtraces one complete turn and includes two beginner labs.docs/CUSTOMIZE.mdgives recipes for common interface changes.docs/ARCHITECTURE.mdexplains the state and session boundaries.
Work with a coding agent
Section titled “Work with a coding agent”The repository’s AGENTS.md file tells a coding agent which files own each
behavior. It also lists the invariants and validation commands that changes must
preserve.
Start with one visual boundary and one pass condition:
Read AGENTS.md and docs/LEARN.md.
Build a new visual shell for this chat.
You may edit components/chat/ and styles/.Do not edit app/api/, hooks/, lib/letta/, or tests/.
Preserve conversation switching, ordered text and tool parts, visible loadingtext, manual scroll position, and restored conversations.
Run npm run verify. Show the changed files and explain how each component mapsto the existing state.
For an SDK event change, ask the agent to read docs/ARCHITECTURE.md and add a
fixture test before it changes the server route or reducer.
Verify your changes
Section titled “Verify your changes”Run the deterministic tests, lint rules, and production build:
npm run verifyThe tests cover event order, fragmented tool arguments, consecutive tools, terminal tool status, restored history, and server-side tool-output filtering.
After a route or session change, send the manual web_search message again.
After a visual change, inspect both an active turn and a restored conversation.
Use another backend
Section titled “Use another backend”This tutorial uses Letta Cloud so that the first run needs only an API key. The React components and ordered transcript model do not depend on the backend.
For a local agent, import the Agent SDK from the package root and create clients
with backend: "local". Local mode runs the agent and its tools on the server
machine. You must also select a model that you configured on that machine.
For a remote agent, connect the server routes to a long-running App Server with
backend: "remote".
See Deploying your agents for the Cloud, local, and remote setup patterns. See Models before you choose a local model.
Deploy safely
Section titled “Deploy safely”This project supports one trusted user. Before deployment, authenticate each request, add rate limits, and store the conversation IDs that each user can access. Do not show one agent’s conversation list to unrelated users.